California Proposition 65 Warning
For more information, visit www.P65Warnings.ca.gov
Payment & Security
Payment methods
Your payment information is processed securely. We do not store credit card details nor have access to your credit card information.
Security
Estimate shipping
-
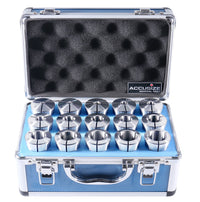
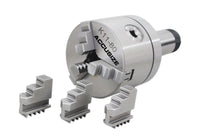
5C 5" Collet Chuck Plain Back for Lathe Machine, #0269-0010
- Please don't buy this item unless you are familiar with this type of product. Thanks.
- Outside Diameter: 5"
- Plain Back, Recessed 3.740'' x 0.184'' Deep
- Can be sued on lathe and grinding machines
- Plain Back, have to choose proper back plate to connet with your machine
- Should be used with back plate (adapter) to connect with your specific lathe spindle
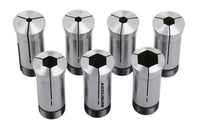
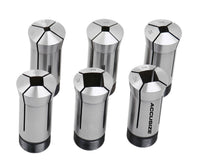
- Can use any size 5C Collet: Round collet :1/16 ~ 1-1/8"; Hex collet:1/8" ~ 7/8"; Square Collet:1/8" ~ 3/4"
- Scroll and pinion design just like 3-jaw chuck, operated with chuck key
- Scroll & pinion precision machined and hardened
- Max. RPM 6000
- Accuracy: 0.0006" TIR
- Weight: 10.44 lbs

Please note that you need to confirm the taper of your lathe using this 5C collet chuck is 14°15' before you place an order. Otherwise, the run-out will not be accurate at all. Please don't buy the chuck unless the taper of your lathe is exactly 14°15'. Usually, when a lathe has been running for a few years, its taper becomes not as accurate as a new lathe, which causes inaccurate run-out when operating the 5C collet chuck.
The method of measuring 0269-5C Collet Chucks
1.Check the runout of lathe spindle first. Adjust the runout value of nose within 0.004mm; of cylinder or taper within 0.004mm shown asbelow.


2.Then put the 5C chuck onto the lathe spindle nose, with the setting hole at the right position to fix each other (While measuring, we used the screw lock device shown in picture-1. We did not have cam lock device shown in picture-2. They work theoretically the same, by different methods.)


3.After putting the 5C fixture into the measuring equipment, enable the screw lock or the cam lock to work with the chuck on the measuring equipment. Please be noticed to tighten the cam screws in multiple strokes crossly.
4.Approach the surface of the taper hole with a micron indicator; then rotate the measuring equipment slightly. Reading and noting the micrometer’s value. Tighten the one or two cam screws to correct the 5C fixture, until the runout value within 0.006mm.


5.Applying the standard 5C measuring bar, use two lock gears to tighten it slightly. And assure the run-out of the 5C fixture orifice, 0.015mm.


-
-
Product NameMaterial Number
-
Product NameMaterial Number